Thankful for a Metaverse Community

If you’re tired of social distancing, read on for my long over due update from the metaverse. These are all examples of what a great community of educators is available to you right now, from the safety of home.

Thankful for Our Community gathering, in Second Life.

The Friday before Thanksgiving about 30 or so of us gathered for the Non-Profit Commons Thankful for our Virtual Communities event. Everyone present represented one or more of the many different non-profit community organizations that are active in virtual worlds. It was an opportunity to connect with people we don’t always get a chance to see, and also to share what our organization is up to. (When you become a citizen of virtual worlds, you quickly come to realize how many different people, organizations, and events there are going on. There are far more places to go, people to meet or collaborate with, or events to attend than any of us can keep up with on our own!)

I live alone, but I don’t ever feel lonely because I spend a lot of time with my colleagues. And make no mistake about it, virtual does not make the relationships any less real!

Día De Los Muertos exhibit in Second Life

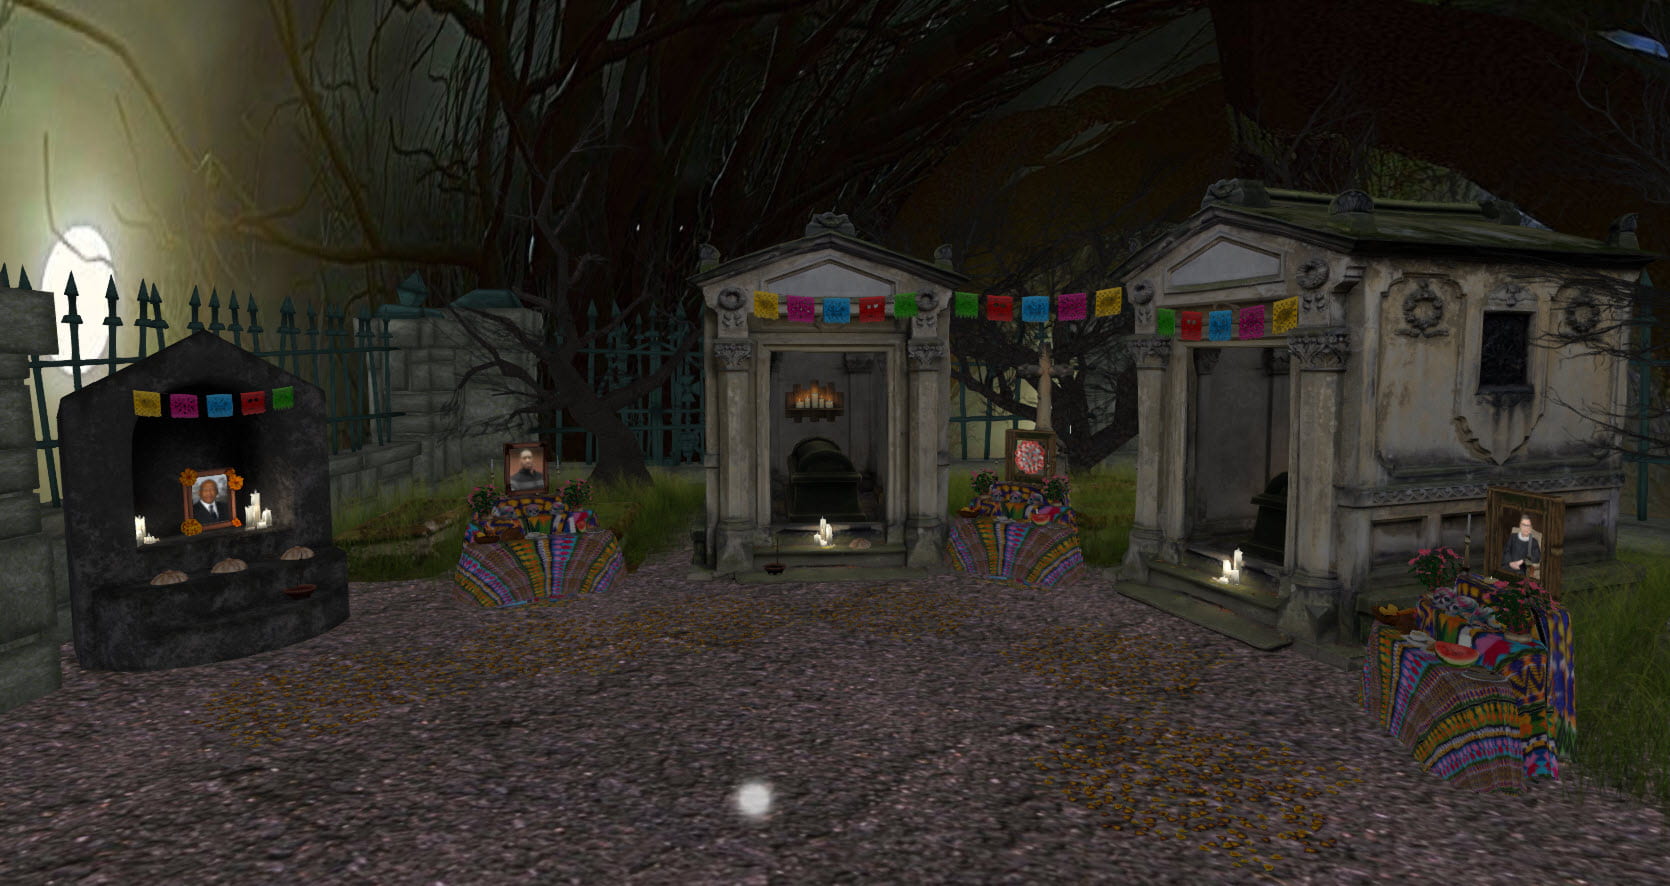
Día De Los Muertos exhibit, in Second Life

On Halloween, I put up a public exhibit for the Second Life community; a Día De Los Muertos scene honoring some of those we lost in 2020. When you land at the exhibit you are greeted by the serene sound of crickets, frogs, and the occasional hoot of an owl in an otherwise quiet small cemetery. I created several altars that represent not just one individual, but whole communities who have lost important people that represent them. Among the photos were George Floyd, Lorena Borjas (Mexican-American transgender and immigrant rights activist), civil rights icons John Lewis and C.T. Vivian, the legendary Ruth Bader Ginsburg, and at the center altar there is an image of the COVID19 virus, representing the many people lost to us this year globally from the pandemic.

I created this exhibit because I think virtual community is now more important than ever, and coincidentally I have a great example to share of the kind of impact this kind of thing has on me and others. When I went in to get the above screenshot of my exhibit for this blog post, here’s a comment that was waiting for me:

appreciation comments screenshot

Thankful for Appreciation

Now can you see why I’m so passionate about virtual worlds? But wait….there’s more!

December Virtual Events in Second Life

My colleagues and I from SJSU’s Virtual Center for Archives and Records Administration (VCARA) and the Community Virtual Library are doing our 3rd annual live reading for this month’s Dickens’ Project. Seanchai Libraries started the Dickens’ Project in Second Life in 2008, and it’s an incredible themed interactive experience offered each year in December. There are more than 60 hours of events at the Dickens’ Project; parties, role play and readings, ice skating, dance performances, live musicians etc. There’s lots of educational and interpretive content related to the Victorian era, and of course about the literature of the day.

The VR Exploder’s Club

Last month our VR Exploder’s Club went back into to AltSpace VR, since it had been quite awhile since our last visit there. A new friend I’d met at a VR conference, Bruce Wolcott from Bellevue College’s XR Lab, also joined us for this outing. In fact, I took everyone back to my favorite exhibit from the Burning Man event because I had been so impressed with it. (It was as moving as I remembered, and my colleagues were also wowed.)

Host a Party in MoHubs for Your Holidays!

Burned out socializing in Zoom?! Mozilla Hubs is just about the easiest and most fun way to quickly get into a virtual environment with up to about 20 other people or so. (Roughly 24 people max can be in the same Hubs room at the same time.) Nobody needs to download anything either. Talk about a perfectly easy way to have a holiday party with your friends!

In fact, I recently built a bunch of virtual rooms for the networking portion of an event for the College of Business. I had help with a handful of other colleagues to be room hosts,  because we had rooms for all the different student teams. It was awesome to see students so engaged in conversation, sharing links with each other to their LinkedIn accounts, and even throwing emojis around so they would bounce off the floor (I didn’t even know that was possible!).  You can take a look at Mozilla Hubs for yourself anytime, just click on this eCampus Mozilla Hub room. (Hint: Make sure to actually enter the room. Check out this tutorial page to see how easy this is to get in and navigate around.)

my avatar in Cheers' Gallery

My avatar, in Cheers’ Gallery

If you want to learn more, be on the lookout for my upcoming workshops. The screenshot above is from a photo gallery I created for an instructor for his students final showcase. Rooms like this are really easy to create, and the holidays are a great time to play around with this technology. Imagine…you could create a room to meet your friends and family in-world with just one click of a button! You don’t even need to create an account, you just click to create the room and email people the link to it! 

Want a customized room for spring semester?  Let me show you how easy it is, or maybe I could just give you one of mine. Email me!

OpenSim Community Conference 2020

Alice in Wonderland seating area

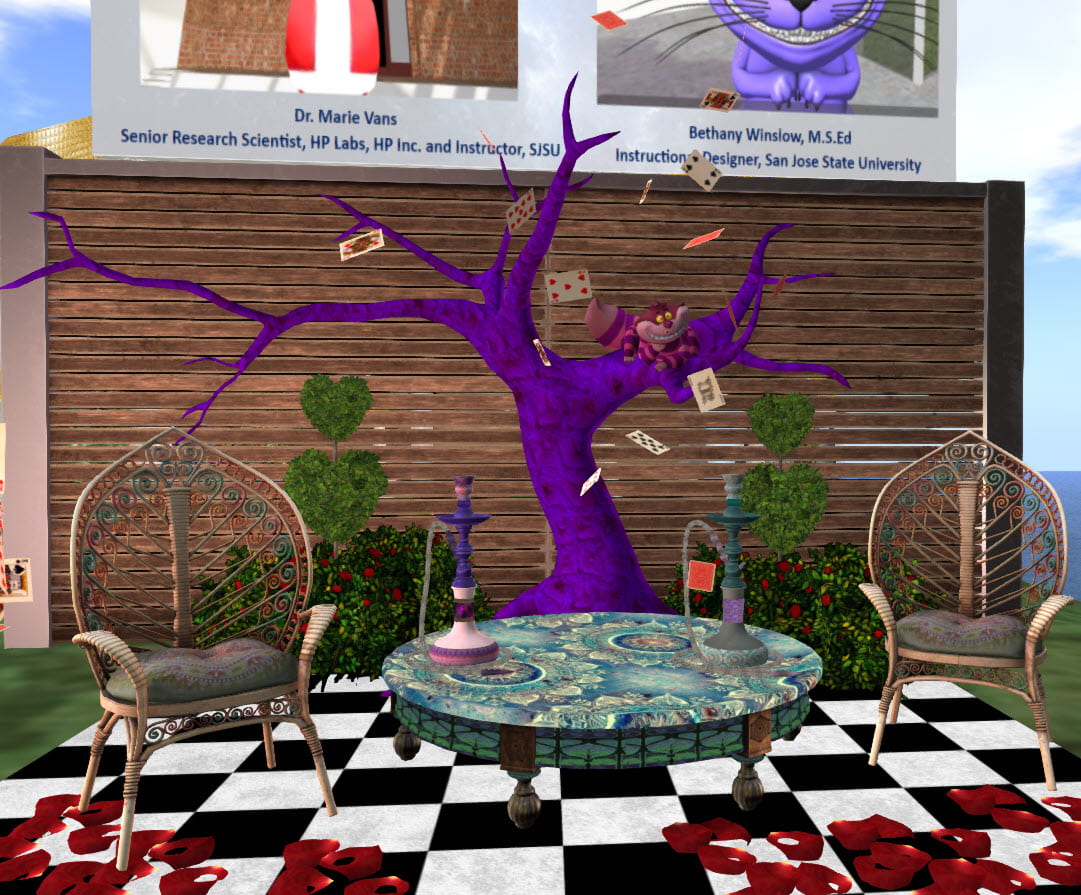
Themed seating area I created for our presentation at OSCC 2020

Speaking of Mozilla Hubs, I’m excited to co-present (along with iSchool’s Dr. Marie Vans) this month at OSCC about the work we’re both doing with this particular platform. But the title of our event should tell you of our ulterior motive, since we still both find OpenSim to be the best virtual platform overall for use in education. Our presentation is on Saturday December 5th, and it’s called Using Browser-Based Virtual Environments as a Gateway Drug to get People Hooked on Virtual Worlds. Marie will be sharing an example from her students this semester in her VR class, where they went into a bunch of different environments to evaluate them. (One of her students is building a working model of the Gutenberg press in…you guessed it, he chose OpenSim!)

It’s not too late to register and attend the conference, but I’ll write a debrief and post a link to the recording of it next month when it’s available. We’ve got a great themed seating area I created, and we’ll be suitably dressed to match. (This community appreciates creativity, so it will be a lot of fun! And I’m sure you’ve figured out the theme from the picture above, and the fact that my Mozilla Hubs avatar in those other pictures is a grinning cat!)

Finally, I also continue to work with Eileen O’Connor from SUNY Empire State College in New York, and am on the steering committee for her nascent Institute of New Paradigms think tank. Currently, my colleagues and I from INP are talking about coordinating a panel to present about our work specifically in OpenSim, and trying to target VR conferences in 2021 where virtual world educators are not as well represented. Eileen is also presenting at OSCC, along with one of her former students, Scott Dolphin.

Well I’ll wrap this up by saying that I continue to be surprised (and disappointed) whenever I attend boring Zoom based conferences, especially when it’s a conference for immersive learning tech and all around me are people who consider themselves knowledgeable about the topic without ever having been in OpenSim or Second Life. I can’t help but shake my head. What a missed opportunity, on so many levels!

🛠️ Tools, tools, and [more] tools!

As the summer winds down, I know many of you are in the midst of online course design for your fall classes. If you haven’t already, please check out eCampus for resources to assist in online pedagogy, course design and development, and instructional technologies. Here are three key resources I recommend.

SJSU Teach Online Canvas course
(access to the Canvas course content from the SJSU Teach Online Summer Certificate Program; Canvas log-in required to access materials)
Equity and Inclusion Frameworks in Design in Online Settings module
(strategies and resources for creating inclusive learning environments; this module is housed within the above referenced SJSU Teach Online Canvas course)
SJSU Canvas Course Template
(eCampus designed template that “prepares the recommended structure and elements for your online course and can be imported into your blank Canvas course”)

In this post, I share tools (as the title aptly states) for both productivity and teaching and learning.

Productivity Tools

Teaching and working from home while balancing personal responsibilities is beyond a juggling act. Here are a few tools to save you time, increase your productivity, and most importantly, maintain your sanity. 

Google Keep Notes – Sticky notes all over the place? Say goodbye to them and hello to a note-taking app. Keep Notes lets you quickly capture to-do’s, lists, photos, audio, etc. And, the app synchronizes across all your devices so that you can save that great idea on the go, wherever you are. And, you can even add location reminders to your Keep Notes – when you reach the preset destination, your reminder will pop up. In order to use the location reminder feature, location permissions on your phone are required. Nonetheless, with this feature, there’s no excuse to forget the milk next time you’re at the grocery store.

OneTab – Raise your hand if you have 10+ tabs open on each of your open 3+ windows/web browsers! 🙋🏾 If this is you too, OneTab is here to-the-rescue. Available for Chrome and Firefox web browsers, this tool reduces tab clutter and saves up to 95% memory by converting all of your open tabs into a list. You’re welcome.

Tech to Try: H5P

What is H5P?

H5P (short for “HTML5 Package”) is a web authoring tool used to develop interactive, engaging learning experiences. With this emerging tech tool, authors can create and edit rich interactive content such as videos, presentations, games, and more.

Why am I interested in H5P?

      • Ability to supplement publisher content and Canvas tools and features by developing my own, customized interactive learning activities
      • Promotes learner engagement and provides real-time feedback (and you can track it using the tool’s built-in analytics)
      • Several content types: interactive video, interactive slides, virtual tour, dictation, and games
      • Content types meet accessibility requirements
      • Free* and open source to create interactive content
      • Content can be embedded in Canvas**
      • No additional cost to students

*The free, open source version can be used to start and test the product but a hosting site such as WordPress is needed to actually implement created learning experiences for students.
**The free, open source version does not directly integrate with Canvas.

Key Features

      • Build interactive content quickly and easily 
      • Pre-made templates for different content types 
      • Integrates with most LMSs like Canvas (paid version) and has plug-ins for publishing systems such as WordPress (free, open source version)
      • 30+ content types
      • Experience API (xAPI)

Use 
As mentioned before, H5P has numerous content types falling under the categories of games, multimedia, questions, and social media. For example, as an alternative to the traditional static PPT, Course Presentations allows learners to “swipe through slides to experience the learning material, while solving various quizzes or watching videos along the way.” (H5P.org) And, with built-in analytics, instructors can view how learners are interacting with the presentation content and assess their performance level. 

Course Presentation Example from H5P.org click on the presentation for a demonstration

Source: https://h5p.org/presentation

Learn more about H5P


My hope is that the posts this past semester provided ways in which you can implement technology in the classroom. By no means is technology the star of the show. It is merely a tool to support and enhance teaching and learning whether that be in-person, hybrid, or fully online. 

Enjoy the rest of the summer and the time it brings to refresh and renew for the next academic year. 

Take good care of yourself and loved ones,

Nicole

💨 Going Beyond Text 💨 : Using Multimedia to Present Online Course Content

This semester marked a rapid transition to remote teaching…and we all made it through! As we prepare for the fall semester and online teaching and learning, I want to highlight eCampus’ Teach Anywhere website and Workshops that can support you during this process. eCampus, the Center for Faculty Development, and the Office of Diversity, Equity and Inclusion are here to help.

This post continues with the UDL framework and its Multiple Means of Representation principle.

UDL Multiple Means of  Representation is the WHAT of learning and focuses on “the way information is presented to increase recognition and understanding.” (Israel, Ribuffo, and Smith, 2014) Students are diverse in both their learning needs and the ways in which they learn. Providing course materials and resources in different ways not only reduce barriers to access and learning but also help students reach course goals by enhancing the learning process. As with all the principles, CAST provides guidelines and checkpoints to facilitate the implementation of multiple means of representation in the classroom.

Learners differ in the ways that they perceive and comprehend information that is presented to them.” (UDL, 2018)

Determine Learning Objectives before Incorporating Multimedia

How you use varied formats and multimedia to present course content depends on your learning objectives. Multimedia – any combination of text, image, audio, video, animation, and simulation – provide alternative and varied means of presentation for course content in order to reach all learners and their different learning styles. Further, using multimedia reinforces studentcontent interaction and improves learning effectiveness. Before incorporating multimedia into your course, using Backward Design (Wiggins and McTighe, 2011) and Bloom’s Taxonomy ensures that content aligns with and supports learning goals and unit-level learning objectives.

In short, people learn better from words and pictures than from words alone. This statement summarizes what has been called the multimedia principle, which has become a fundamental principle of instructional design based on a growing body of research evidence.” (Mayer, 2019)

Utilize a Range of Formats and Multiple Media to Enhance Learning 

Student↔content interaction in the online environment is more than just reading an eBook or an article on the web, although this is still one format that should be incorporated in the course. There are so many tools that can be used to present content and information to learners in various ways. After determining what activity or assessment would best support the learning objective, brainstorm about different technologies and/or multimedia that could be implemented to create the learning experience.

Because students have unique learning styles, online courses should include activities and assessments that are varied to meet the learning styles of all students.” (NEA, 2014)

Present content with text+visuals, video, or even simulation. Each learning unit or module does not have to comprise all multimedia formats. Further, do not overwhelm students by using too many tools; choose one or two to start. But, be sure to provide both a variety and balance of multimedia to allow for different types of student interaction with content, activities, materials, and resources throughout the course. Below are some examples that enable instructors and students to access content and apply knowledge in a wide variety of ways. To find more multimedia resources, check out OER Commons and Merlot as well as your textbook publisher.

Video: Offer diverse and multiple perspectives by curating videos from the web. Seamlessly integrate videos in your course by embedding in a Canvas page, discussion, or assignment.
Tools: Embed Video into a Canvas Page; Canvas Studio.
Resources to curate videos: YouTube, Khan Academy, TEDEd. And check out the eLearning industry’s List of Educational Video Site Collections.
Narrated PPT Presentation: Amp up your text-based PPT by recording audio over them. “Chunk” course content into mini-lectures that cover key points and concepts. Each presentation should be no more than 10 minutes in duration!
Tools: PPT and Camtasia. Or alternatively, insert audio into Google Slides.
Podcast: Students can listen to lectures anywhere and multitask while doing so. Good for aural learners and those who need flexibility in accessing course content. Also, instructors can use podcasts to share their research or expertise with the wider community.
Tool: Enable a Podcast feed in Canvas
Resource: ELI discovery tool: Guide to podcasting.
Infographic: Visual aid used to organize and present information. Infographics can be instructor provided or student created.
Resource: Quality Matters’ Resource List for Infographics.
Video Discussion: Numerous ways to engage students with video and increase active learning. Students can submit video responses for Canvas discussions or even use Zoom for small group discussion activities.
Tools:  Canvas Discussion Video Submissions, Zoom Breakout Rooms, or FlipGrid.
Multimedia Collaborations: Use collaborative multimedia tools to build and foster the online learning community. Students can work in small groups to create and present content using text, audio, video conferencing, and other tech tools.
Tools: Group Spaces, Collaborations, or Conferences.

Present Content in a Consistent, Organized Structure

Incorporating multimedia can create an engaging and stimulating online course. Or, it can just be downright overwhelming if not properly designed and integrated into the course. Developing an organized, consistent online course structure guides the student’s online learning experience. And, an organized course structure eases the navigation and use of online tools and multimedia in order to minimize student frustration and confusion. Unit-level modules organized by topic or week help students’ awareness of all related multimedia activities and assignments and supports student responsibility and accountability in their learning process. 

Resources

Make Your Content Accessible 

Keep all learners and their diverse needs in mind as you design and facilitate your course. Ensure that any formats and multimedia you use are compatible with assistive technology, images are described using alt text, and videos have closed captions. Using campus licensed technologies is beneficial because not only will you receive prompt technical assistance if needed (as technical issues can and will arise!), but also these technologies are already vetted to meet accessibility requirements. Lastly, be sure to provide accessibility documentation for all technologies used in your course. 

Resources

Provide Tutorials and Tech Support Contact Information

Today’s students are “digital natives” and heavy consumers of tech products and services, e.g., social media, online shopping, etc. However, most are not familiar with or well-versed in educational and instructional technologies; they’re learning right along with us. As such, provide guides and tutorials for course technologies and multimedia. And, clearly provide contact information and direct students to the appropriate tech support whether that be eCampus for Canvas and other instructional technologies or the textbook publisher for its online content. In addition, students may need general IT support for their device (laptop or tablet) and/or software used to access multimedia; SJSU IT support can help in this case. This information can be housed in a “Start Here” module under a Course Technologies and Support page; see the SJSU Canvas Course Template referenced prior for an example.

Resources


References
CAST (2018). Universal Design for Learning Guidelines version 2.2. Retrieved from http://udlguidelines.cast.org
eCampus, San Jose State University. (2020). eCampus. Retrieved from https://www.sjsu.edu/ecampus
Israel, M., Ribuffo, C., & Smith, S. (2014). Universal Design for Learning innovation configuration: Recommendations for teacher preparation and professional development (Document No. IC-7). Retrieved from University of Florida, Collaboration for Effective Educator, Development, Accountability, and Reform Center website: http://ceedar. education.ufl.edu/tools/innovation-configurations.
La, H., Dyjur, P., & Bair, H. (2018). Universal design for learning in higher education. Taylor Institute for Teaching and Learning. Calgary: University of Calgary.
Mayer, R. E. (2019). How multimedia can improve learning and instruction. In J. Dunlosky & K. A. Rawson (Eds.), The Cambridge handbook of cognition and education (p. 460–479). Cambridge University Press.
National Education Association. (2014). Guide to teaching online courses. Retrieved from http://www.nea.org/assets/docs/onlineteachguide.pdf.
Wiggins, G. P., & McTighe, J. (2011). The understanding by design guide to creating high-quality units. ASCD.
Wiggins, G. P., & McTighe, J. (1998). Backward Design. In Understanding by Design (pp. 13-34). ASCD.

📝 + 💻 Online Exam: ONE type of high-stakes assessment

With the end of the semester fast approaching, high-stakes assessments are top-of-mind for both faculty and students alike. And, given the current switch to remote and online teaching, instructors may be wondering whether they can convert their in-person paper final exam to an online format or even considering another assessment type altogether. The third principle of Universal Design for Learning, Action and Expression, recommends that instructors offer assessment options for students to show and demonstrate their understanding of course content (UDL on Campus). A collaborative group project, portfolio, video submission, or paper are just a few examples of summative assessments in which students can express what they know. Based on course goals and learning objectives, an online exam is another appropriate assessment, especially if varied assessment types have been used throughout the course. 

There are various tools that can be used to set up, administer, and proctor online exams. However, it is best to use campus licensed and supported tools to not only receive prompt tech support and training but also to have the assurance that these tools are already vetted by campus instructional designers. Before delving into specific tools, below are some general suggestions and best practices to implement for high-stakes online exams.

        • Offer students a window of opportunity to take the exam, e.g., 24 or 48 hours
        • Give students an ungraded practice exam so that they can try out the technology used beforehand and adjust to the online testing environment
        • Consider decreasing the weighted grade category for high-stakes online exams, e.g., reduce from 20% of total grade to 15%
        • Vary exam question types
        • Reduce the length of time allotted to take the exam 
        • Provide student guides, tutorials, and privacy & security documents for online exam technologies used (available on the SJSU eCampus website or from the company directly)
        • Increase instructor availability; instructors should be readily accessible by phone and email during exam session times
        • Create a backup plan for students who have access challenges and encounter extenuating circumstances (no stable internet, laptop/computer not working, software issues, etc.) when attempting to take the online exam

Canvas Quizzes, Respondus Monitor, and ProctorU, all SJSU eCampus vetted and licensed tools, can be used in combination to create and monitor online exams. And, with Canvas Quizzes, instructors can vary question types to offer students multiple ways to show their understanding of course content.

Exam Creation Tool – Canvas Quizzes

Canvas is the learning management system (LMS) for SJSU. Canvas has many features and its Quizzes function can be used to create online exams and set additional exam security functions. The below instructions and images are from the Canvas LMS Community Commons.
Key features to enable when setting up Canvas Quiz Details:

        • Quiz Type – Graded
        • Time limit
        • Uncheck the box for “Let Students See Their Quiz Responses”
        • Set Quiz Restriction – Require an access code
        • Quiz Availability Range

Choose Quiz Details to set quiz type as graded

Name Exam
1. Enter a short description of the exam and you can also include an honor code statement.
2. Select Graded Quiz as quiz type
3. Select the assignment group for the exam, e.g., Exam 1. (Set up weighted grade categories based on assignment groups in Canvas.)


Set Quiz Options
for exam time limit and other security options

1. Shuffle question answers – Do not use this option if there are question answer options with “A and D” or “all of the above” since shuffling answers will not keep this sequence
2. Implement a “tight” time limit for the exam
4. Uncheck the box for “Let Students See Their Quiz Responses”
6. Uncheck the box for “Let Students See The Correct Answers”
7. Optional: Check the box for “Show one question at a time”


Set Quiz Restrictions
to require a student access code in order to take the exam


1. When using an online proctoring service such as ProctorU, the “live” proctor will enter the given access code for the student.
If using Respondus Monitor, send out the access code to students right before the exam availability starts. Or alternatively, use the “Lock This Quiz” feature (see below).


Assign Quiz Dates
to set exam availability range

1. Assign Exam to everyone – If assigning the exam to one student or certain students with a different due date or availability range, click “+Add”, enter the student’s name, and set parameters for that student.
2. Due date – date and time when the exam is due
Exam availability range
3. Available from – date and time when the exam is available to students to take
4. Until – end date and time when students can no longer take the exam


Save the Quiz

Save the Quiz periodically throughout the editing process.

Do not click on “Save & Publish” until all edits, including exam questions, are finalized. And, for added security, wait until a few days before the exam time before publishing.


Publish the Quiz

1. When ready to publish the Quiz, select “Publish”
6. Ability to lock or unlock the quiz. When the quiz is published, if “Lock this quiz now” is selected, then students can see the title of the quiz but will not be able to access it.
Use this option for Respondus Monitor. Then, right before the exam availability date, unlock the quiz so that students can access it.
In the end, remember to publish the quiz.

Canvas Quiz Question Options
Now that Quiz Details have been set up, create the exam questions.

There are various question types in Canvas quizzes. Instructors can build questions from scratch and/or use questions from an outside source such as a publisher test bank. Canvas has the following question types and options:

And, there is a feature to use question groups to randomize quiz questions for each student.

Canvas Quiz Accommodations
Once the Quiz is published, the “Moderate This Quiz” feature allows for extended time testing accommodations or even multiple attempts to take the exam.

Online Proctoring Tools – Respondus and ProctorU

There is no foolproof method to prevent cheating, even for in-person proctored exams. But the following online proctoring tools, coupled with Canvas Quiz security features and exam administration best practices, can be implemented to mitigate most academic integrity concerns. Note that online proctoring requires that students have stable internet connectivity and a computer/laptop with a webcam and microphone.

Respondus
Respondus has two products – LockDown Browser and Monitor. Lockdown Browser can be used alone or accompanied with Monitor. Do not use Lockdown Browser alone unless it is a well-timed, essay response exam type. With LockDown Browser, students are “unable to print, copy, go to another URL, or access other applications” on their laptop or computer while taking the exam, hence “lockdown.” But, it does not prevent students from using other aids such as cellphones, textbooks, handwritten notes, peer sitting next to them, etc. Respondus Monitor, the companion product to Lockdown Browser, conducts a pre-exam “environment check” via webcam and records the student’s exam session. This added feature minimizes most of the security issues found with using LockDown Browser alone. 

To learn more:

ProctorU
ProctorU Live+ is considered one of the “most secure options for online exams.” With this online proctoring tool, a live person monitors the student’s exam session via webcam and microphone and can intervene in real-time. In addition to live monitoring, there is an exam precheck that includes student ID verification and, if applicable, post-exam incident reporting. Here’s the ProctorU Live+ student walkthrough video to get a better idea of the online test-taking environment and process from the student perspective.

To learn more:


References
CAST (2018). Universal Design for Learning Guidelines version 2.2. Retrieved from http://udlguidelines.cast.org
Live+ Online Proctoring Backed by Artificial Intelligence. (n.d.). Retrieved from https://www.proctoru.com/services/live-online-proctoring
Respondus Monitor. (n.d.). Retrieved from https://web.respondus.com/he/monitor/
UDL On Campus: UDL and Assessment. (n.d.). Retrieved from http://udloncampus.cast.org/page/assessment_udl
What options can I set in a quiz? (n.d.). Retrieved from https://community.canvaslms.com/docs/DOC-26470-what-options-can-i-set-in-a-quiz

Effective, Targeted Feedback 🎯


Feedback, offered in a timely way, encourages learners to persist through challenges.” CAST Professional Learning, 2016

In my last post about online discussions as a means to engage learners, I touched on the importance of providing instructor feedback to encourage student participation and communicate clear assignment expectations. Continuing with the Universal Design for Learning (UDL) principle of engagement, this post will focus on tech tools to support one of its underlying guidelines – sustaining student effort and persistence through feedback. According to CAST research, effective feedback is described as “relevant, constructive, accessible, consequential, and timely” (CAST, 2018). In addition, the CAST UDL Increase Mastery-Oriented Feedback checkpoint outlines further elements as listed below.

    • “Provide feedback that encourages perseverance, focuses on development of efficacy and self-awareness, and encourages the use of specific supports and strategies in the face of challenge
    • Provide feedback that emphasizes effort, improvement, and achieving a standard rather than on relative performance
    • Provide feedback that is frequent, timely, and specific
    • Provide feedback that is substantive and informative rather than comparative or competitive
    • Provide feedback that models how to incorporate evaluation, including identifying patterns of errors and wrong answers, into positive strategies for future success” (CAST, 2018)

Canvas and Zoom are two tech tools with features designed to aid effective and efficient instructor feedback. In Canvas quizzes, there is an automated, pre-populated feedback feature so that students can receive prompt, corrective intervention on assessments. Audio or video comments in Canvas assignments allow for specific, personalized feedback. Finally, Zoom is a great video conferencing tool for more in-depth, individual or group learning support akin to in-person office hours. And, these tools can be used not only for corrective feedback but also as a means to encourage (or praise!) all learners in the class. See below for limited instructions on how to implement these tools; as always, eCampus is available for further consultation.

Canvas Quizzes Automated feedback can be pre-populated in the quiz answer comment fields.

  • In Canvas Quizzes, click the “Edit” button and then click the “Questions” tab to view quiz questions.
  • [1] Click on the comment field beneath each answer to leave a specific comment for that particular answer.  OR
  • [2] Create general answer comments for the quiz question as a whole. Correct answers receive feedback in the green comment field. Incorrect answers receive feedback in the red comment field. The blue button comment field provides feedback to all students regardless of in/correct answer response.
  • The comments field can also be used to connect feedback to resources by including a link to a Canvas page within the course or external site.

pdf on chat

Image and instructions from  Canvas Guide on Multiple Choice questions.


Canvas Assignments Audio or video feedback (text and attached file too) can be provided via Canvas SpeedGrader.

  • Audio and Video support different learning styles and foster student-instructor interaction for online students.
  • Audio comments are especially helpful for language learning. 
  • Files can also be attached to the comment section by clicking on the paperclip icon.

In the Canvas Assignment, Click on SpeedGraderpdf on chatOpen Student Submissionpdf on chat Add Media Comment to Record Audio or Videopdf on chatSubmit Commentpdf on chat

Images and instructions from  How do I leave feedback comments for student submissions in SpeedGrader.


Zoom Video Conferencing for in-depth student support and virtual office hours.

  • Can be used for standing, weekly virtual office hours or as-needed basis.
  • Option to use Zoom as audio call only or video conference.
  • Screen Sharing allows for instant sharing and review of materials on your computer, laptop, or mobile device.
  • Whiteboard allows you to write or draw on a blank screen and share with participants. And, you can save whiteboard sessions.

 Sharing a Whiteboard

 Click the Share Screen button located in your meeting tool bar.pdf on chat

 Click Whiteboard.pdf on chat

 Click Share.

The annotation tools will appear automatically, but you can press the Whiteboard option in the meeting controls to show and hide them.

Use the page controls in the bottom-right corner of the whiteboard to create new pages and switch between pages.pdf on chatNote: Only the participant or host that started sharing the whiteboard has access to create and switch pages.

 When you are done, click Stop Share.pdf on chat

Images and instructions from  Zoom Sharing a Whiteboard.


Of the above tools, Zoom (headquartered in San Jose!) is my favorite for many reasons. First, it’s accessible and easy to use. Just send an invitation link and the recipient can click on the link to access the Zoom meeting right away; no prior setup or account registration is required. And, students are impressed with Zoom’s ability to serve as a tech aid in their learning process. I can screen share their progress on Canvas assignments and also seamlessly switch over to the whiteboard to write out a particular concept or draw a graph. Lastly, student exposure to Zoom is beneficial as this communication tool is used in the workforce as part of the recruiting-interview process and on-the-job to collaborate with remote coworkers or interact with clients.

This post wraps up the UDL engagement principle. Next, I’ll share about Multiple Means of Representation and a new tool I want to try to support this principle.

Image Source: CAST UDL Guidelines, http://udlguidelines.cast.org


References
Canvas Guides. (n.d.). Retrieved February 20, 2020, from http://guides.instructure.com/m/4152/l/41477-how-do-i-create-a-multiple-choice-question
CAST (2018). Universal Design for Learning Guidelines version 2.2. Retrieved from http://udlguidelines.cast.org
How do I leave feedback comments for student submissions in SpeedGrader? (n.d.). Retrieved February 20, 2020, from https://community.canvaslms.com/docs/DOC-12746-415255023
Sharing a whiteboard. (n.d.). Retrieved February 24, 2020, from https://support.zoom.us/hc/en-us/articles/205677665-Sharing-a-whiteboard
Top 10 UDL Tips for Engagement (2016). Retrieved February 19, 2020, from http://castprofessionallearning.org/project/top-10-udl-tips-for-engagement/