Anthony Bolaños

Anthony Bolanos

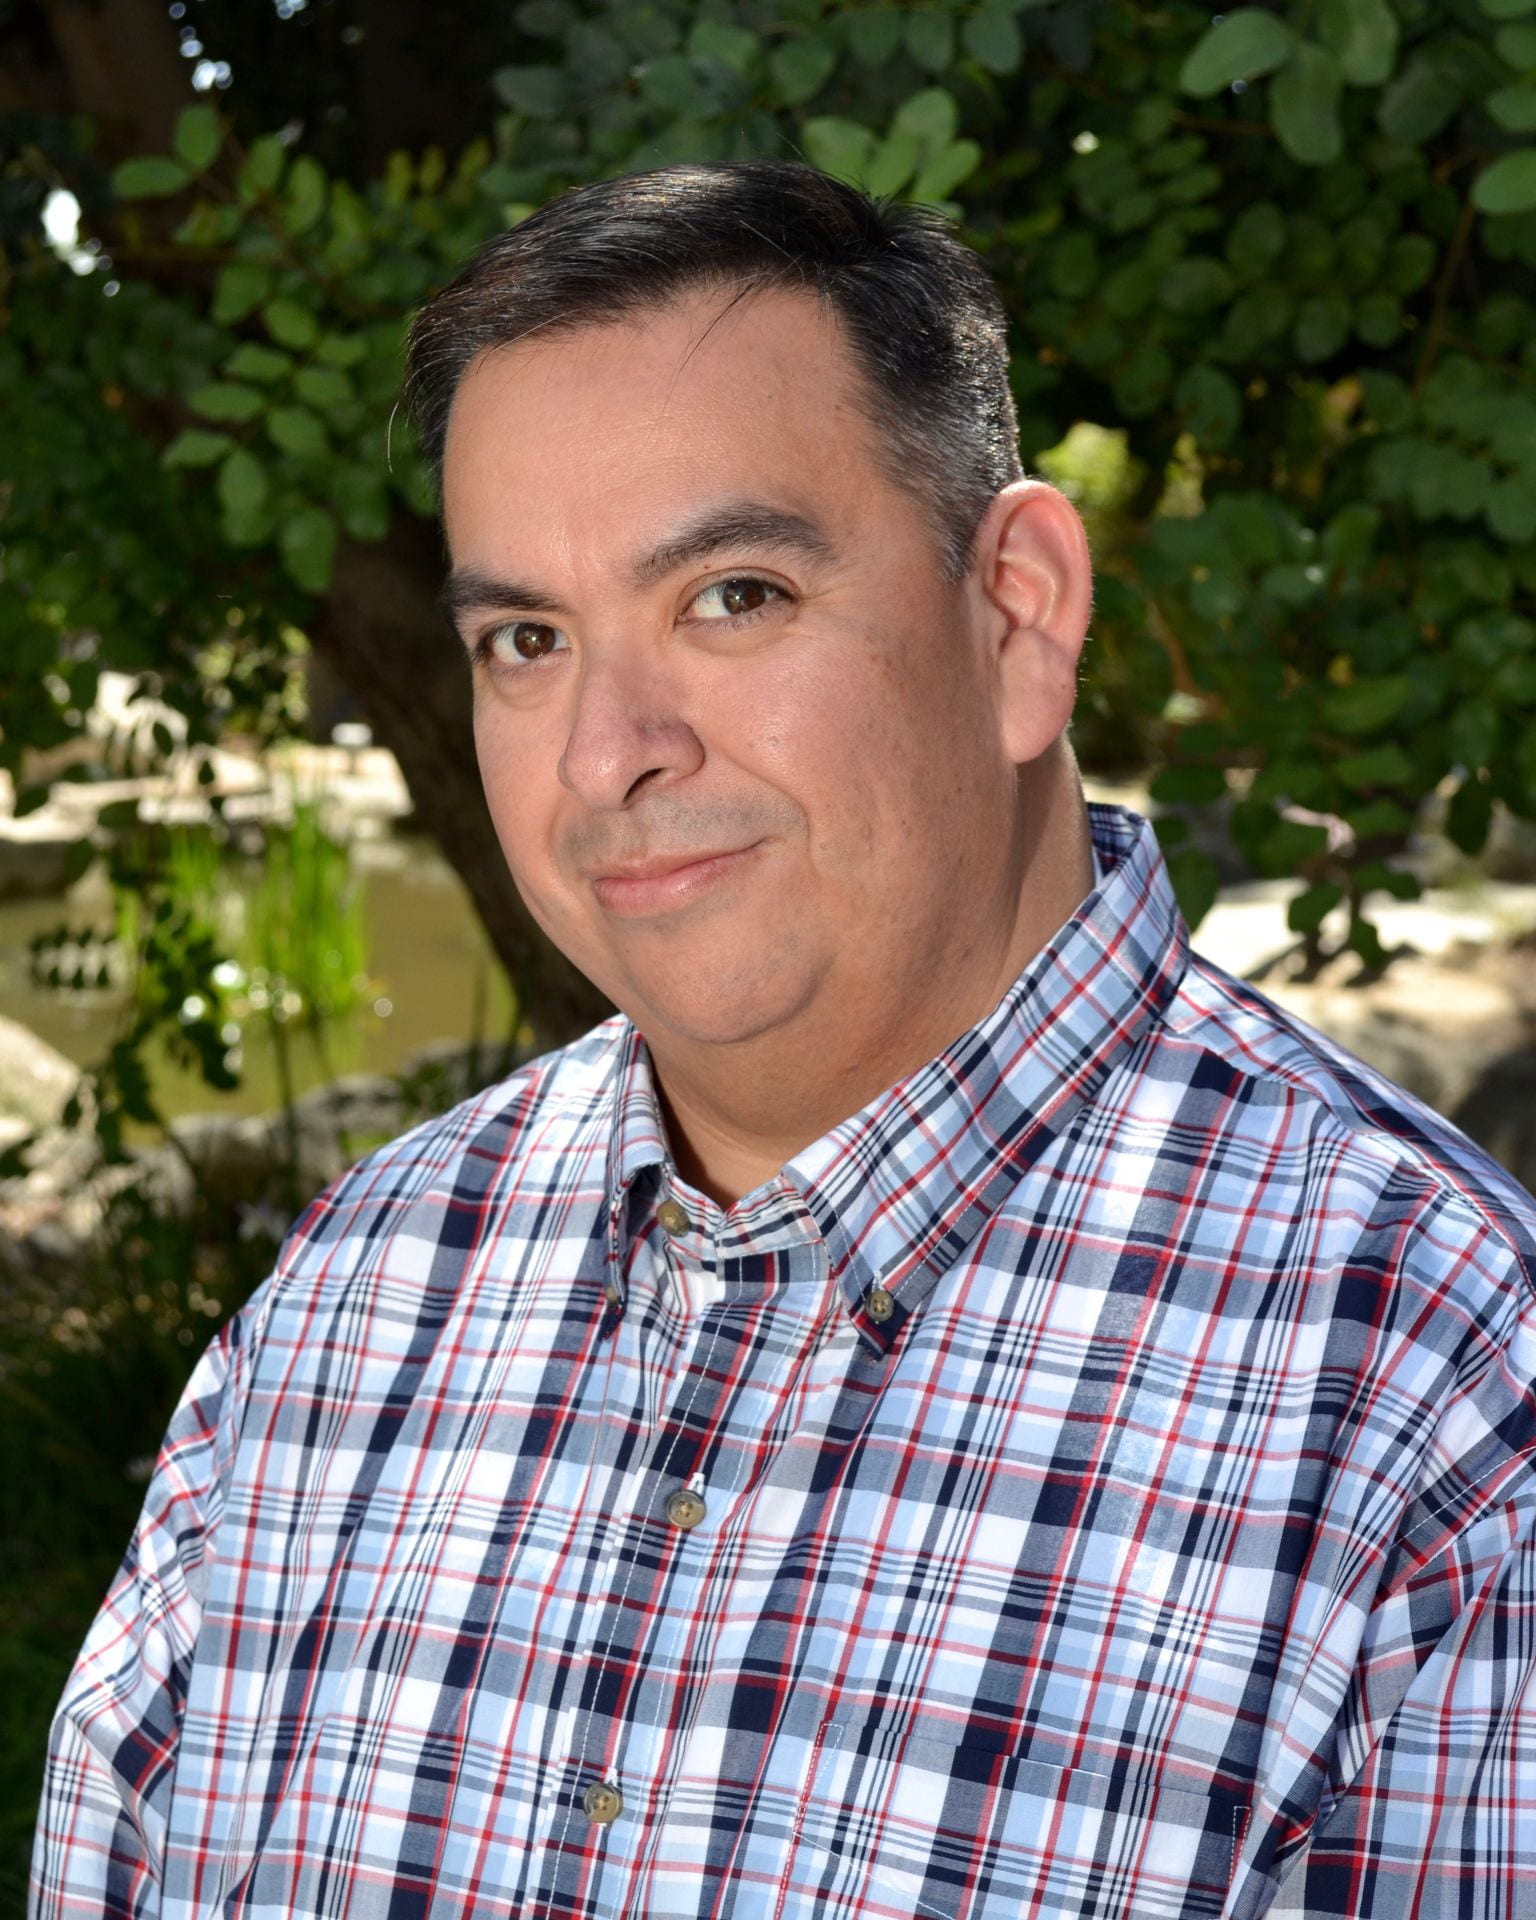
I am very pleased to announce that our eCampus team is growing. Anthony Bolaños has joined us as our new Instructional Designer. With more than 6 years of experience, he’s obsessed with innovating new ways for simplifying the tasks of all the instructors and students.

Anthony is from Bakersfield, and he graduated from CSUB in 2015 with his degree in Computer Science/Information Systems. At CSUB, he started his employment as a student tutor for the computer science department. He then took on a job with the Faculty Teaching and Learning Center (FTLC) in January 2014. His first initial FTLC job was an Instructional Technologist position from January 2014 to November 2018. He was then promoted to Instructional Designer at CSUB starting November 2018.

Anthony has an amazing professional journey and innumerable accomplishments. He was a system administrator for their Learning Management Systems, Blackboard and the Canvas Pilot, that will be seen in production by Summer 2020. He was an admin for SharePoint, InfoReady, TechSmith Relay for lecture capture, and Turnitin. He made several audio podcasts recordings sessions of professors or students presenting their work at CSUB. He recorded Dr. Anthony Flores’ interview for the BBC in 2016. Anthony has recorded Dr. Kim Flachmann presenting several chapter introductions for her online book through Pearson Publishing.

He is a technophile and has a lot of interest in AR/VR development and Computer Programming. He also is a connoisseur of food and loves to talk about it. He also has one more exceptional talent; He is a drummer. He said, “If I wasn’t an Instructional Designer. I would have been a VR/AR developer or a touring drummer.”

The most liked thing about eCampus according to him is “Working with a great team of many talents, also meeting professors and helping them out with their courses”. At eCampus, he is currently working on ArcGIS workshops and assisting professors with migrating Vimeo videos to our Studio video server on Canvas.

When Anthony is not working, he travels with his wife Jodie and their miniature poodle Trini down to visit their son Isaac, a freshman at CSU Channel Islands. He also plays on different musical projects when asked and goes to live concerts and fine dining restaurants with his wife as much as they can.

On behalf of eCampus, SJSU, we would like to welcome Anthony. All of us here are excited to get to know him and work with him on upcoming projects.


References

Bolaños, Anthony. (2020, Feb 11). Interview type [email].

Zoom, Just got better!!!

Zoom just launched some really cool and much awaited features. Lets unbox the new Zoom.

Meeting/webinar features

The webinars will no longer need a search for a tidy/formal space to sit when attending a video conference as you can now set a virtual background. You can now attend your video conferences without thinking which background looks decent enough.

Image/Video as Virtual Background

Users can select an image/video as their virtual background. You might need to have a image available on your system or select one of the default options available. You can also have a video in your system for virtual background or use the default video available and use it for the meeting. Make sure the video is in mp4 or mov with a resolution of 360p-1080p.

To achieve the same, let’s create a new meeting on Zoom.

Steps

You will see some default images available for virtual background

Default Images for Virtual Background

You can select any of these

Default Image set as Virtual Background

Or you can add an image of your choice by adding it from your computer. Click on the Plus(+) icon and then click on add image

Add Image from PC

Select an image from your PC and click on Open

Uploaded Image

Now when we check the virtual background it should be set as the image we selected


Lets check how we can set a video as virtual background

We do have some default video options present

Default Video Options

Select any of these to see a video virtual background

Default virtual video background applied

Want a video of your choice to be on the virtual background , select a video that you want as the virtual background from your computer.Add video

Select from computer

Add Video from PC

Select the video you added

Select Video from System

Add or edit profile picture during a meeting.

Users logged into their Zoom account can now add or edit their profile picture during a meeting. If they are not logged in, users will be prompted to login or sign up with Zoom and can subsequently change their profile picture from their Zoom web portal.

Steps:

  1. Make sure you login to Zoom.
  2. Go to the meeting you want to join. When your camera is turned off, the participants in the meeting can see your profile picture. You can change it if you want to even during the meeting.Profile Picture Visibility
  3. Go to the home screen of zoom application. Click on setting button below the profile picture on the top right corner


Settings


4. Go to Profile tabProfile Settings

5. Click on the profile picture and a new window should open up. You can edit your current profile picture from this window or change the picture for a new one.

Edit Profile Picture Screen

Change Picture–> Select a new profile picture from your PC and click open.

New Picture from PC

New profile picture

Click on save and you should be able to see your new profile picture in the meeting tab

New Profile pic on meeting


Meeting features

Skin tones for meeting reactions.

Users can now set a skin tone for their meeting reactions.

Go to Settings –> General –> Select the Reaction skin tone

Colour

You can send reactions when on the meeting from the reaction icon in the bottom panel of the meeting

Chat features

Format text in chat messages:

Users can now format their chat messages with bold, italics, strike-through and bullet points.

Start a chat by clicking on the chat icon on the home screen of zoom application

Chat Screen

You can format your text as below. Highlight the text and you should see some options above

Bold

Bold

Italics

Italics


Strike-through


Bullet Points

Bullet Points


Reply with an image, file, voice message, or code snippet:

Users can now reply with an image, file, voice message, or code snippet, in addition to text and emoji replies.You will see a reply option right next to every message. When you click on it a reply text bar comes up

Reply with Image

You can reply with a screenshot or an image that is available on your google drive or your system.

Reply Bar Options

Select the portion you want to screenshot and click Capture to insert it in the chat


Reply with File

You can reply with a file that is available on your google drive or your system. The file can be a image, pdf, a audio file or a video file.

Select File

Audio file from computer

Select audio file from computer and Click open

Audio file from computer

Audio on Chat

Video file from computer

Select video file from computer and Click open

Video file from Computer

Video on Chat


Pdf from computer

Select pdf file from computer and Click open

pdf file from computer


pdf on chat

Reply with Code Snippet

Code Snippet option should be enabled on zoom chat if not already done

Go to settings –> Chats

Check the first option

Show “Code Snippet” buttonChat Settings

Click on code snippet option in the chat and then download window should appear. Download the same.


Click on inset code snippet on the chat and the below window should appear.

Enter title and language of code. Enter the code and click create snippet.

Code snippet should be added to the reply.

Code snippet in chat

Reply with emojis

You can reply with emojis via any of the below icons

Smiley icon below the message

emoji1

From the reply text window

emoji 2

Enhanced “happy birthday” reaction:

When a user sends the message “happy birthday”, the Zoom client will now show cake emojis.

Enter a message Happy Birthday. Click Enter

Happy Birthday message

ACADEMIC TECHNOLOGY EXPO – 2019

The 2019 ATXpo- Academic Technology Expo held at Santa Clara University on October 7, 2019 was the sixth annual ATXpo that brought together the insightful and bright minds from eight Bay Area esteemed universities that included- University of San Francisco, UC Berkeley, UC San Francisco, Stanford University, San Francisco State University, San Jose State University, Santa Clara University and Saint Mary’s College of California. These universities aimed to provide an exposure to the recently acquired technologies that are going to promote learning and improve the conventional methods of teaching.

This was a full day event where participants interacted with each other. The agenda included a Keynote Session, highlights on featured projects, and three sessions of IdeaLabs. These sessions were engaging and were experimented on through play .These sessions exhibited the projects and technologies that are surfacing to, promote an interactive and better learning environment. It demonstrated the new generation teaching methodologies that can be acquired by universities for more equipped classrooms and knowledge transfer experiences.

Attendees from San Jose State University left an remarkable impression and their efforts worth their weight in gold. So it’s worth taking the time to find just the right words to describe their work below.

Jennifer Redd (Director of eCampus- San Jose State University) talked in her introductory presentation about how important is it to communicate she said, “the development of a communication plan that encourages creativity is a great supplement to providing technical and instructional support.” She mentioned how eCampus proudly produces artwork catered to the campus community. The artwork creates a safe, welcoming, and inclusive atmosphere. Every month eCampus showcase one person, who has impacted the world in a positive way and illustrate them on our, ‘Person of the Month’ wall. She clearly made us all understand that, you have to find a way to communicate to cultivate the learning and knowledge.

During the second IdeaLab Session, Jennifer joined Assistant Professor of Psychology Valerie Carr as she shared how she designed a neuroanatomy lab by using augmented and virtual reality. Dr. Carr, a previous eCampus Immersive Learning Institute Participant who worked closely with eCampus Lead Instructional Designer Yingjie Liu, described how she selected and implemented the use of different AR/VR apps into the curriculum to provide students with an immersive experience on a complex topic (the brain).

ATXpo - Jennifer

Bethany Winslow (Instructional Designer at eCampus- San Jose State University) talked and demonstrated about this intriguing topic, “Tinkering in Virtual Worlds: Experiential Preparation & Networking for VR Ready Educators” She presented a demonstration of the Hypergrid Resources Library she built, that connects different virtual worlds in the OpenSim metaverse. Bethany volunteers with The Community Virtual Library, which has had a presence in virtual worlds for over a decade now. Open-source virtual worlds like the one she showcased are hosted on a distributed system of servers all over the world. She offered participants with an opportunity to try navigating an avatar on the laptop to explore the library and to Hypergrid jump to another location. Bethany shared her experiences in the last year and a half of networking and collaborating 100% in the virtual world with a global community of educators and librarians, of attending multiple virtual events, and about presenting in-world at virtual educational conferences. She urges any educators interested in integrating virtual reality with their teaching to make sure they are familiar with the long history of desktop virtual reality used for teaching and learning.

Bethany In-WorldPresenting

Bethany’s avatar in virtual world library with some of the posters she presented

Yingjie Liu (Instructional Designer at eCampus- San Jose State University) gave an impressive tour, where participants immersed in the world of augmented reality. Her topic was, “Using a Self-guided Augmented Reality Tour as a Service Learning Project that Teaches Students and Others about Campus Sustainability”

She highlighted the initiatives going on in our University and mentioned students in a Geology of California course at San Jose State University (SJSU) during the Spring’19 session, created an augmented reality sustainability tour of the campus as part of a service-learning Earth Day 2019 project. This project was designed to:

1) Teach students concrete ways to live sustainability

2) Draw attention to the sustainability practices on campus and

3) Contribute to the school’s sustainability mission.

These goals were accomplished by having students research sustainable practices, locate examples on campus, then create augmented reality (AR) tour stops that highlight and explain the sustainability examples. The students contributed to SJSU’s sustainability mission by providing an AR tour that teaches others about sustainability and encourages participation in the school’s efforts to be more environmentally friendly and sustainable.

She demonstrated how this project, revamped San Jose State University’s outdated online Sustainability Map and elevated the user experience by making it mobile (accessed via smartphone or tablet), and immediate (instant on-the-spot information). She concluded that by saying, “Overall, students had a positive experience creating, using, and learning from augmented reality. Students’ reflections revealed that prior to doing the project, they had little knowledge of SJSU’s sustainability practices. After having completed the project, students displayed a sense of pride for all that the school does to be environmentally sustainable. They also felt that they gained knowledge about what sustainability is, and learned something new about sustainability at SJSU.”
She encouraged people on how this example set by San Jose State University should be a motivation for thousands of such initiatives and guided on how these initiatives can take a kick start.
ATXpo- Yingjie
References
2. Winslow, Bethany. (2019, Oct 10). Interview type [email].
3. Liu, Yingjie. (2019, Oct 10). Interview type [email].
4. Redd Jennifer. (2019, Oct 10). Interview type [email].

Posting grades on the new version of Canvas grade book

With continuous updates from Canvas on the grade book we saw a lot of confusion among the instructors and graders. This blog will talk about the recent Canvas update on the grade posting and how you can make the most of the new functionality. The change was implemented to provide more control on posting grades as now it can be posted with respect to sections and features. 

We used to have a mute feature in the previous versions of Canvas grade book where instructors used to mute the assignment, to temporarily hold any grading notifications or comments getting to the students. Instructors sometimes use this feature to hold the grades as long as they are done grading for every student in the class and then release the grades together for an assignment.

This image below shows the working in earlier version of Canvas

Previous version mute feature

On the new version of Canvas grade book, the steps to mute (now called hide/post) an assignment are as follows

  1. Go to the Course on Canvas
  2. Open grade book.
  3. Choose the Assignment you want to start grading
  4. Click on the three dots against the assignment name on the right
  5. Select Grade Posting Policy
  6. A new window appears with two options ‘Automatically’ and ‘Manually’
  7. Select Automatically if you want the students to get notified about the grades as you enter grade for the assignment for individual students.                                                                            OR
  8. Select Manually to temporarily hold any grading notifications or comments getting to the students and post it all at once when you want.
  9. After you made your choice click on ‘Save’.

Grade Posting Policy

10. You can make grade updates for students after that.

11. If you selected Manually as your option, when you are ready to post the grades please click on the three dots against the assignment and click on the Post Grades Option.

Post Grades

Post Grades Manually Working

11. A new window appears with three options- ‘Hidden’, ‘Everyone’, ‘Graded’

12. Hidden is selected by default. You have to select ‘everyone’, if you want everyone to know and see the assignment is graded or select ‘Graded’ just to post the grades to the students with graded submissions.

13. Click on Post.

You can set the entire grade book to post grades manually/automatically instead of doing that individually for every assignment. The steps for that are as follows

  1. Click on the Settings icon in the top right corner of the grade book
  2. Go to Grade posting Policy Tab and set it to Manually/ Automatically
  3. Click on Update.

Grade book setting for grade posting policy

Below are the clips

Automatically Posting grades

Automatically post grades

Manually Posting Grades

Manually Post Grades settings for entire gradebook

Canvas now also has a setting where instructor can hide already posted grades this may happen when grader has already displayed grades but suddenly decides they should be hidden to students temporarily.

Hide Grades

We can also hide grades from speed grader instead of gradebook

In SpeedGrader, the Mute icon has been replaced by the Visibility icon, and the behavior mimics the previous functionality in hiding grades to students.

In the Visibility menu, select the Hide Grades option [1]. Hiding grades displays the same three options available when hiding grades in the New Gradebook [2]. Select the preferred hidden option and click the Hide option [3].

Hiding grades via speed grader

Post Grades after you are done grading.

Posting grades via speed grader


Note: These settings will not have any effect on grades that are already posted.

To get more information on the new grade posting feature of Canvas grade book please follow the below link.

https://community.canvaslms.com/docs/DOC-17587-new-gradebook-and-speedgrader-muting-behavior-changes


References- https://community.canvaslms.com/docs/DOC-17587-new-gradebook-and-speedgrader-muting-behavior-changes

Welcome Spartans


Welcome to the new semester, Spartans. We love to see the campus moving and buzzing again. Get ready to kick start the new semester with confidence. We know starting a new semester with new people and environment can sometimes be a little overwhelming. You are being given instructions about so many new things, applications, rules etc. and you may feel a little perplexed.

We understand.

As you take your first classes for this semester, your instructors may talk about different instructional software they will be using throughout the semester to accentuate learning and provisioning a platform for sharing class materials, discussions, teamwork and submissions.

The eCampus team is here for assistance with all the instructional software SJSU offers, like Canvas, Respondus Lockdown Browser, Turn it in, iClicker, Zoom, Qualtrics etc. We can help you if you want to know about these applications and understand how they work. We can help you if you face any issues while working on these platforms.

We also provide Adobe Creative Cloud for free to all the currently enrolled students of SJSU. You can seek assistance for getting an adobe creative on your device and use all the adobe applications.